Tutorial : Letak Bokeh Pada Gambar
In the name of Allah, The Most Beneficent and Merciful

//Half of my big family\\
Tau apa itu bokeh? Tengok benda bulat-2 atas tu. Comel kan? Kalau nak buat meh sini.
You must needed :
-PhotoScape
-Gambar yang nak di-edit
-Gambar bokeh (Google search)
1) Buka PhotoScape > Editor
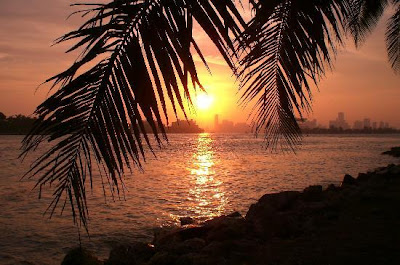
2) Buka gambar yang korang nak letak bokeh tu. Contoh gambar ni :
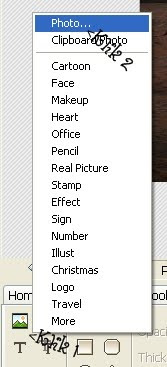
3) Tekan gambar scene > Photo
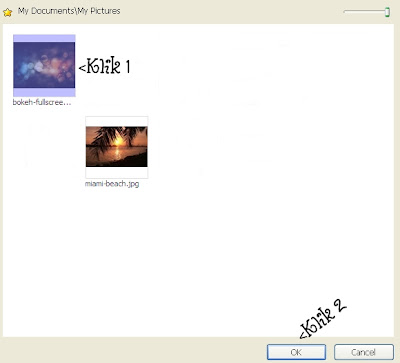
4) Open gambar bokeh.
5) Kurangkan opacity gambar tu sehingga 64.
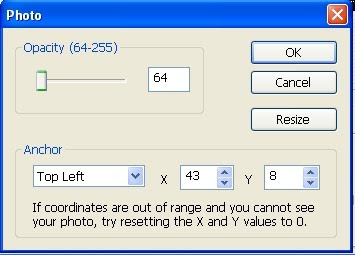
6) Pandai²lah korang tarik kiri kanan atas bawah gambar bokeh tu utk samakan saiz dengan gambar belakang.
7) Dah puas hati, Save aja ! :)
And the result is . . Tadaa ~ !
Labels: Tutorial
Tutorial : Letak Bokeh Pada Gambar
In the name of Allah, The Most Beneficent and Merciful
//Half of my big family\\
Tau apa itu bokeh? Tengok benda bulat-2 atas tu. Comel kan? Kalau nak buat meh sini.
You must needed :
-PhotoScape
-Gambar yang nak di-edit
-Gambar bokeh (Google search)
1) Buka PhotoScape > Editor
2) Buka gambar yang korang nak letak bokeh tu. Contoh gambar ni :
3) Tekan gambar scene > Photo
4) Open gambar bokeh.
5) Kurangkan opacity gambar tu sehingga 64.
6) Pandai²lah korang tarik kiri kanan atas bawah gambar bokeh tu utk samakan saiz dengan gambar belakang.
7) Dah puas hati, Save aja ! :)
And the result is . . Tadaa ~ !
Labels: Tutorial
Profile
The Girl Behind The Laptop

★ In short, I am :
• A malay muslim.
• Lives in Terengganu, studies in Selangor.
★ Bloggie :
• Created since 24 November 2009, five days after celebrating my 10th birthday.
• Created by
Ummi because I was interested in blogging when I saw she's updating her blog.
• Sesuci Kejora has been here for almost 11 years. Big applause :')

 //Comel tak comel?\\